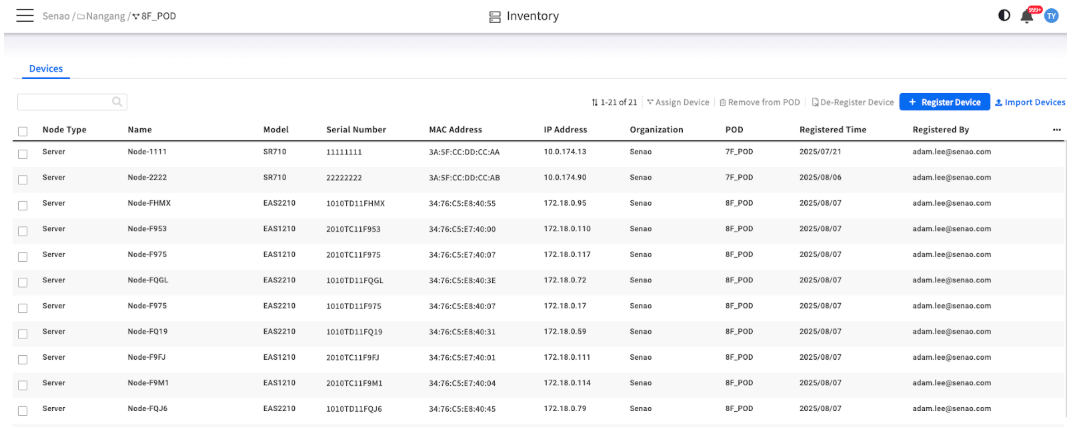
The main Inventory interface, showing the list of nodes and columns
Registration → Inventory → Assignment → Active Management
| Stage | Status | Capabilities | Purpose |
|---|---|---|---|
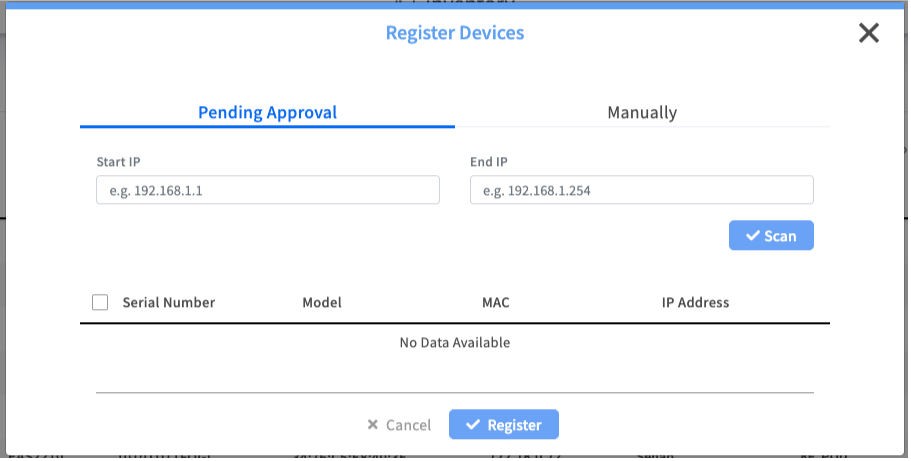
| 1. Registration | Initial discovery | Basic identifiers recorded | Introduce node to EDCC platform |
| 2. Inventory | Asset list only | No management possible | Holding area for unassigned nodes |
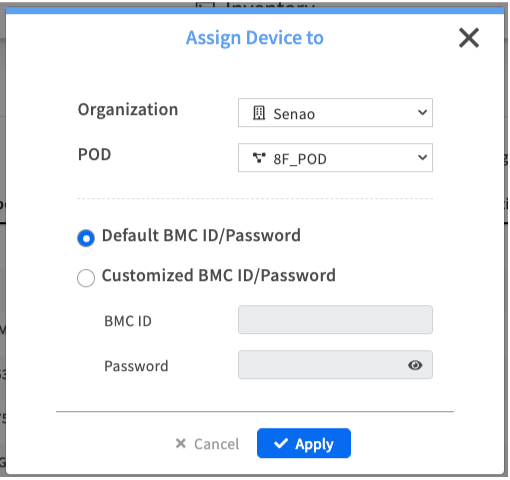
| 3. Assignment | POD assignment | Inherits POD context | Prepare for active management |
| 4. Active Management | Fully operational | All EDCC features unlocked | Complete monitoring and configuration |
The main Inventory interface, showing the list of nodes and columns
| Column | Description & Why It Matters |
|---|---|
| Name / Model | The node's user-defined name and its hardware model. |
| Organization | The top-level organization that this node is registered to. |
| Serial Number | The unique hardware serial number, your primary identifier for asset tracking. |
| IP / MAC Address | The network identifiers for the node's BMC, crucial for troubleshooting connectivity. |
| POD | The Most Critical Column. This tells you the node's current lifecycle stage at a glance. If blank = Inventory (Stage 2, unmanaged). If it shows a POD name = Active Management (Stage 4). |
| Registered Time / By | An audit trail showing when the node was added to EDCC and by which user. |
| Action | What it Does | Consequence | When to Use |
|---|---|---|---|
| Remove from POD | Moves an active node from its POD back into the central Inventory. | The node becomes unmanaged. All history, event logs (including BMC SEL), and configuration records within that POD are permanently lost. | When you need to re-assign a node to a different POD or temporarily take it out of active management. |
| De-register Device | Permanently deletes the node's record from the entire EDCC platform. | The node is completely removed from EDCC. To manage it again, you must re-register it from scratch. | Only when a node is being permanently decommissioned and will no longer be managed by EDCC. |