> For the complete documentation index, see [llms.txt](https://doc.engenius.ai/llms.txt). Markdown versions of documentation pages are available by appending `.md` to page URLs; this page is available as [Markdown](https://doc.engenius.ai/s11-user-guide/core-component-installation/servicing-cooling-and-power.md).
# Servicing Cooling and Power
This chapter covers routine maintenance tasks for components that ensure your server stays cool and powered on. You'll learn how to replace system fans, power supply units (PSUs), and the motherboard's battery.
## **Replacing a system fan module**
The server uses hot-swappable fan modules. If a fan fails, you can replace it while the server is running.
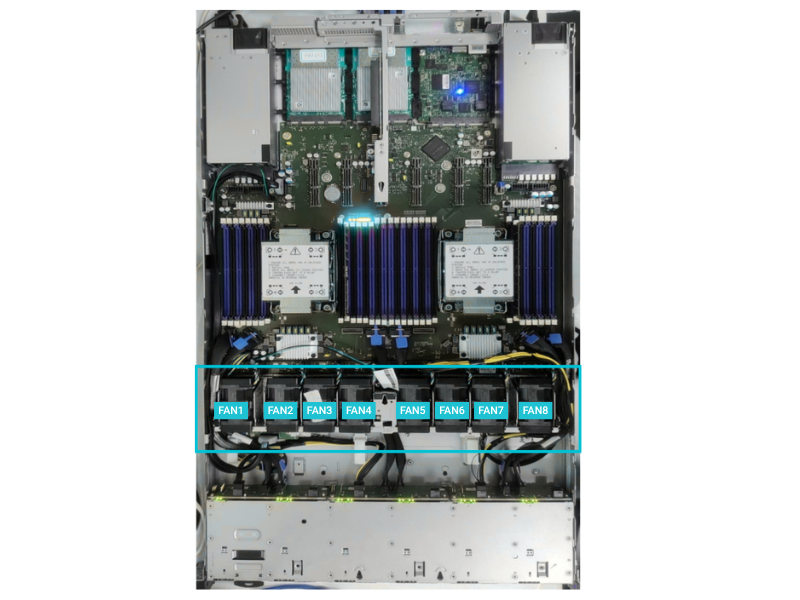
### Fan Module Overview
Fan Slot #
Fan Type
Connector Type
Zone Coverage
Controlled By
FAN1
8-pin PWM
Standard PWM
DIMM CPU0E-H zone
BMC
FAN2
8-pin PWM
Standard PWM
CPU0
BMC
FAN3
8-pin PWM
Standard PWM
CPU0
BMC
FAN4
8-pin PWM
Standard PWM
DIMM CPU0A-D zone
BMC
FAN5
8-pin PWM
Standard PWM
DIMM CPU1E-H zone
BMC
FAN6
8-pin PWM
Standard PWM
CPU1
BMC
FAN7
8-pin PWM
Standard PWM
CPU1
BMC
FAN8
8-pin PWM
Standard PWM
DIMM CPU1A-D zone
BMC
### To replace a fan module:
1. Identify the failed fan. The system's management interface (BMC) will report a failed fan.
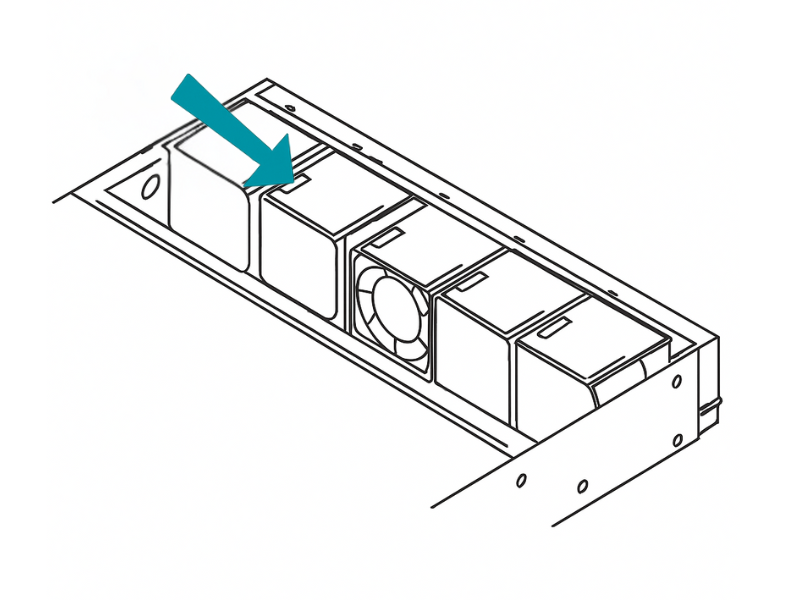
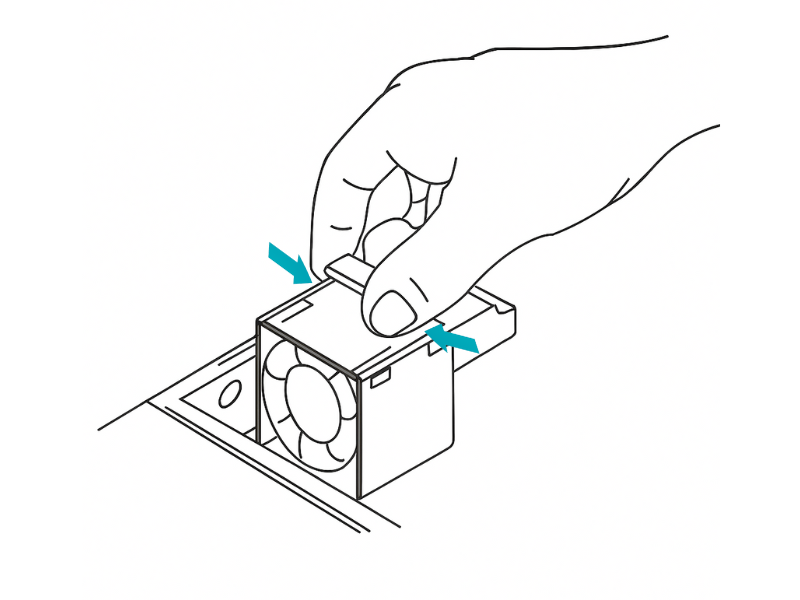
2. Release the fan module. Grasp the top of the fan module and press the release tab.
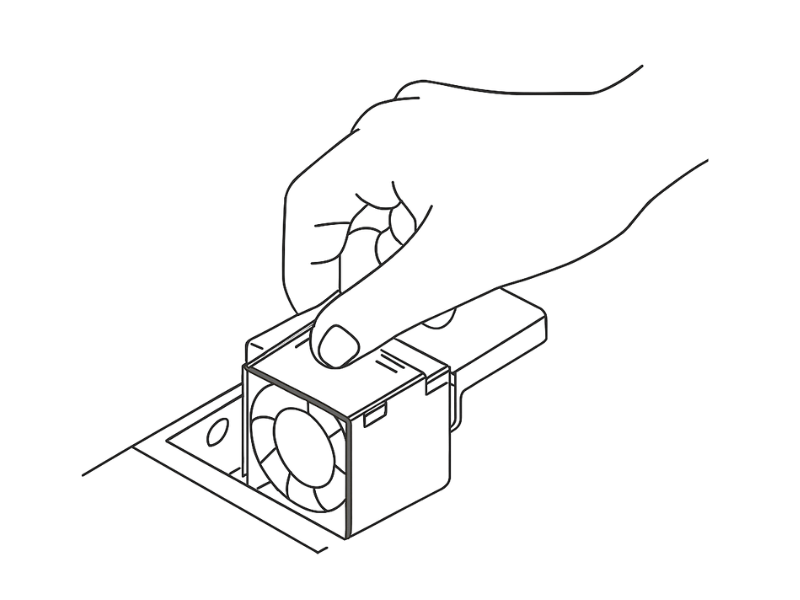
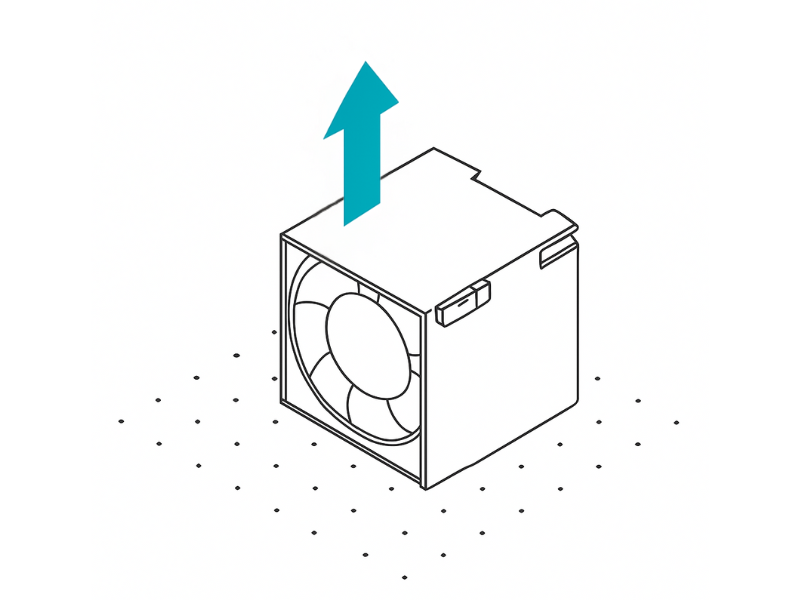
3. Remove the module. Lift the fan module straight up and out of the chassis.\
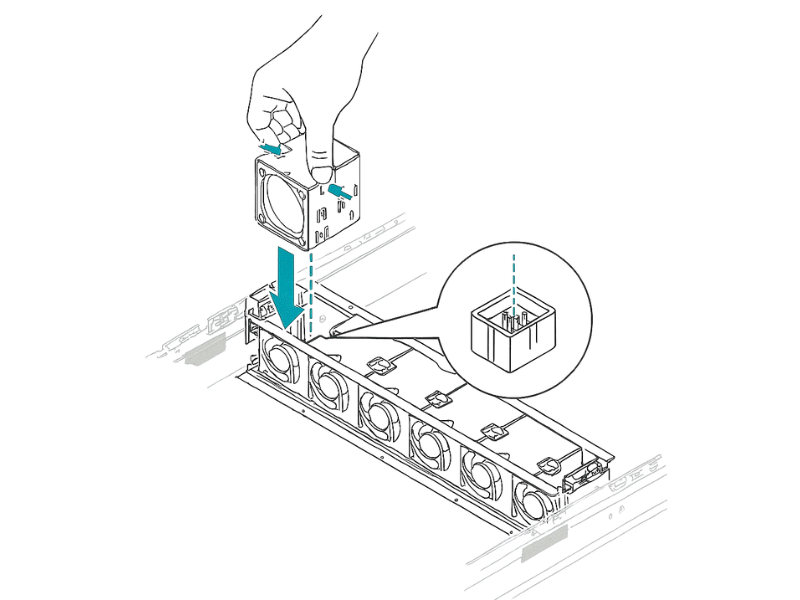
4. Install the new fan module. Align the new fan module with the empty slot and press it down firmly until it clicks into place.
{% hint style="success" %}
**Best Practice: Replace failed fans immediately**
Never run the server for an extended period with a missing or failed fan.
{% endhint %}
## **Replacing a power supply unit (PSU)**
This server is equipped with two hot-swappable PSUs for redundancy.
### To replace a PSU:
1. Identify the failed PSU. A failed PSU is typically indicated by an amber or red fault LED.
2. Disconnect the power cord from the failed PSU only.
3. Remove the failed PSU. Press the release latch and pull the module straight out.\
4. Insert the new PSU until it clicks into place.
5. Reconnect the power cord.
## **Replacing the motherboard battery**
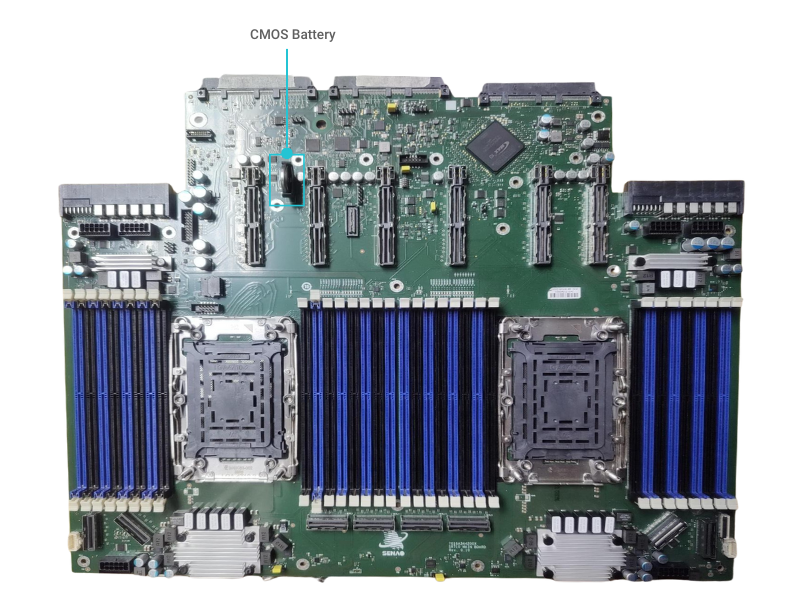
The motherboard has a coin-cell battery (CR2032) that maintains the system's clock and BIOS settings.
{% hint style="danger" %}
**Warning: Battery Safety Precautions**
* Use **only the same or equivalent type** of battery as specified by the manufacturer.
* Do not **dispose of the battery in fire or attempt to recharge it**. Risk of explosion or chemical leakage.
* Handle the battery with care. Improper handling may cause burns or short circuits.
* Dispose of used batteries in accordance with **local environmental regulations**.
{% endhint %}
### To replace the battery:
1. Power off the server and open the chassis.
2. Locate the battery on the motherboard.\
3. Remove the old battery. Gently push the metal clip on the side of the holder to release it.
4. Install the new battery with the **"+"** side facing up.
5. Close the chassis and power on. You will need to enter the BIOS setup utility to re-configure the date, time, and any custom settings.
---
# Agent Instructions
This documentation is published with GitBook. GitBook is the documentation platform designed so that both humans and AI agents can read, navigate, and reason over technical content effectively. Learn more at gitbook.com.
## Querying This Documentation
If you need additional information that is not directly available in this page, you can query the documentation dynamically by asking a question.
Perform an HTTP GET request on the current page URL with the `ask` query parameter, and the optional `goal` query parameter:
```
GET https://doc.engenius.ai/s11-user-guide/core-component-installation/servicing-cooling-and-power.md?ask=&goal=
```
`ask` is the immediate question: it should be specific, self-contained, and written in natural language.
`goal` is optional and describes the broader end goal you are ultimately trying to accomplish on behalf of the user. GitBook uses it to tailor the answer towards what is most useful for that goal.
The response will contain a direct answer to the question and relevant excerpts and sources from the documentation.
Use this mechanism when the answer is not explicitly present in the current page, you need clarification or additional context, or you want to retrieve related documentation sections.
.png)