> For the complete documentation index, see [llms.txt](https://doc.engenius.ai/llms.txt). Markdown versions of documentation pages are available by appending `.md` to page URLs; this page is available as [Markdown](https://doc.engenius.ai/s11-user-guide/getting-started/rack-installation.md).
# Rack Installation
This chapter guides you through mounting the server into a standard equipment rack. You’ll install the rails first, then slide the chassis into place.
## **Installing the rails**
The included rail kit is designed for tool-less installation in most square-hole racks, but you can also use screws for added stability or for round-hole racks.
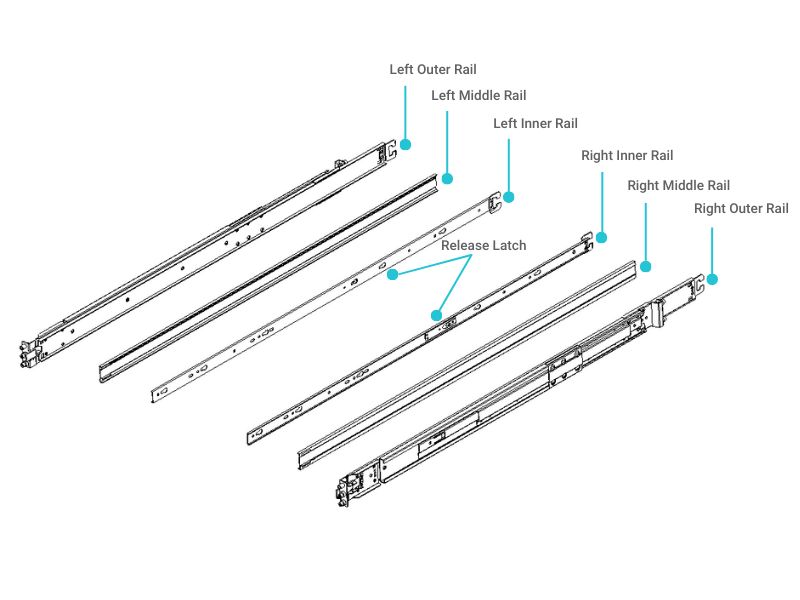
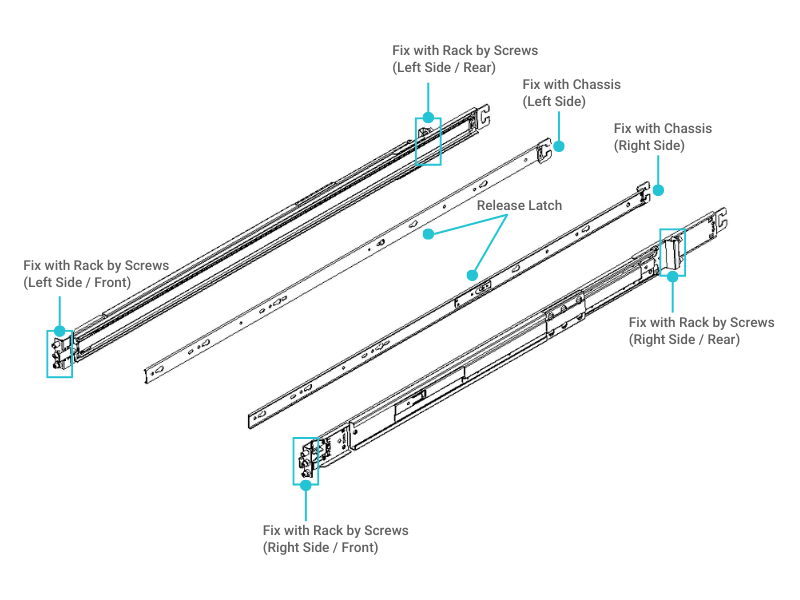
Each rail assembly consists of two main sections: an outer rail that mounts to the rack and an inner rail that stays attached to the server chassis.
### **To install the rails:**
1. **Identify the left and right rails.** The rails are marked with an "L" (left) and "R" (right). The left rail should be installed on your left side as you face the front of the rack.
2. **Adjust the rail length.** Extend the rail to match the depth of your rack, from the front post to the rear post.
3. **Attach the rails to the rack.** Align the hooks on both ends of the rail with the desired "U" position in the rack. Push the rail against the rack posts until the latches click securely into place.
{% hint style="info" %}
**Best Practice: Ensure the rails are level**
Before you mount the server, use a level to check that both rails are perfectly horizontal and at the same height. Uneven rails can make it difficult to slide the server in and may cause the chassis to twist over time.
{% endhint %}
## **Mounting the chassis in the rack**
With the rails securely installed, you're ready to mount the server.
{% hint style="danger" %}
**Warning: Heavy object**
The server chassis is heavy. To avoid injury or equipment damage, ask for assistance. It is recommended that two people lift the chassis, while a third person helps guide it into the rails.
{% endhint %}
### **To mount the chassis:**
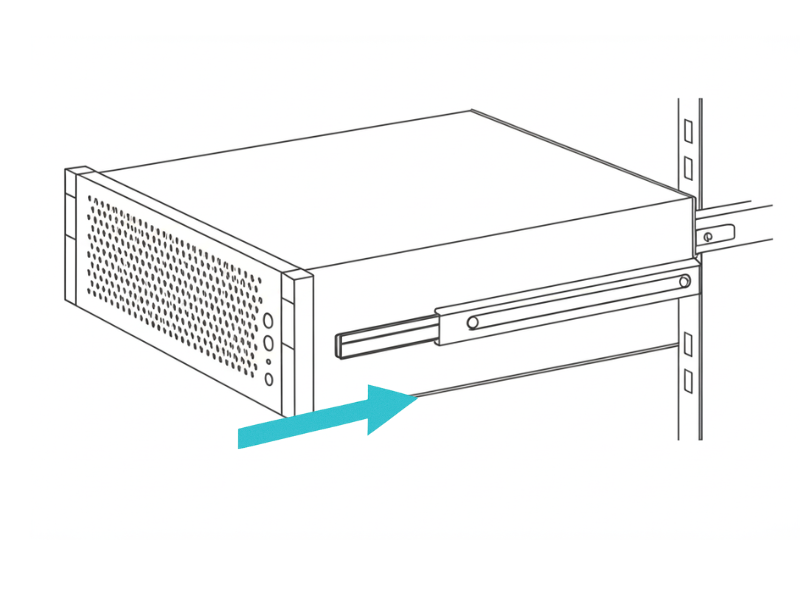
1. **Align the chassis with the rails.** With a person on each side, lift the chassis and align its inner rails with the front of the outer rails that are mounted in the rack.
2. **Slide the chassis into the rack.** Gently push the chassis into the rack until it is fully seated. You should hear a "click" as the server locks into place.
3. **Secure the chassis.** Use the thumbscrews or locking clips on the front of the server to secure it to the rack. This prevents the server from accidentally sliding out.
## **Connecting cables and initial power-on**
Once the server is physically installed, you can connect the cables and perform the first power-on test.
1. **Connect the network and peripheral cables.**
* Connect at least one network cable to an onboard LAN port or an OCP NIC port for data connectivity.
* Connect a network cable to the dedicated **Management Interface (BMC)** port for remote management.
* If you plan to work locally, connect a keyboard, mouse, and monitor (VGA).
2. **Connect the power cords.** Connect the two power cords to the **Power Supply Units (PSUs)** at the rear of the server. For redundancy, you should plug each cord into a separate power distribution unit (PDU) or UPS.
3. **Power on the server.** Press the **Power** button on the front panel of the server.
4. **Verify the initial boot process.**
* Confirm that the system fans spin up and the front panel LEDs light up.
* Watch the monitor or use the remote KVM to ensure the system completes its power-on self-test (POST) and you see the BIOS messages.
{% hint style="info" %}
**What to Expect: Fan Noise at Startup** It's normal for the system fans to spin at full speed for a few seconds during startup. They will slow down once the system's initial self-tests are complete.
{% endhint %}
{% hint style="success" %}
**Pro Tip:**
**What if the server doesn't power on?**
If nothing happens when you press the power button, the most likely cause is a power connection issue. Double-check that both power cords are securely plugged into the PSUs and the power source.
**Label everything**
Before you move on, take a moment to label both ends of every cable (power, network, etc.) with the server's hostname or asset ID. This will save you a tremendous amount of time during future maintenance or troubleshooting.
{% endhint %}
---
# Agent Instructions
This documentation is published with GitBook. GitBook is the documentation platform designed so that both humans and AI agents can read, navigate, and reason over technical content effectively. Learn more at gitbook.com.
## Querying This Documentation
If you need additional information that is not directly available in this page, you can query the documentation dynamically by asking a question.
Perform an HTTP GET request on the current page URL with the `ask` query parameter, and the optional `goal` query parameter:
```
GET https://doc.engenius.ai/s11-user-guide/getting-started/rack-installation.md?ask=&goal=
```
`ask` is the immediate question: it should be specific, self-contained, and written in natural language.
`goal` is optional and describes the broader end goal you are ultimately trying to accomplish on behalf of the user. GitBook uses it to tailor the answer towards what is most useful for that goal.
The response will contain a direct answer to the question and relevant excerpts and sources from the documentation.
Use this mechanism when the answer is not explicitly present in the current page, you need clarification or additional context, or you want to retrieve related documentation sections.
Connecting%20cables%20and%20initial%20power-on.png)